Ever wondered how to turn your ideas into stunning, three-dimensional artwork? Epoxy 3D art has taken the art world by storm, allowing artists and DIY enthusiasts alike to create mesmerizing, realistic visuals that seem to leap off the surface.
With the global epoxy resin market projected to grow at over 7% annually, more and more creators are discovering the versatility and depth that epoxy can bring to their projects.
This surge in interest comes from epoxy’s unique ability to create layered, multi-dimensional effects, making it ideal for crafting everything from 3D epoxy wall art to intricate epoxy 3D sculptures.
However, working with epoxy in a 3D context requires certain techniques and a solid medium understanding.
If you’ve been looking to bring a new level of realism and texture to your art—or simply explore the potential of epoxy 3D art—keep reading to uncover essential techniques, project ideas, and step-by-step guidance.
Dive in and start transforming your imagination into reality!
What is Epoxy 3D Art?
Epoxy 3D art is a captivating art form that uses layers of epoxy resin to create depth, dimension, and a realistic, multi-dimensional effect in artworks.
Unlike traditional two-dimensional art, epoxy 3D art incorporates layering techniques to build up a piece, giving it the illusion of depth and making it appear almost lifelike.
Artists achieve this effect by applying layers of clear or pigmented epoxy resin over each other, often embedding objects or adding details to each layer before letting it cure. This layering technique creates a three-dimensional visual effect, enhancing realism in subjects like ocean scenes, landscapes, or even abstract designs.
Popular applications of epoxy 3D art include 3D epoxy wall art and epoxy 3D sculptures, which make stunning additions to home decor and personal collections.
This art form allows artists to transform their ideas into immersive visuals, offering viewers a unique, almost tangible experience. For artists, epoxy 3D art is both a creative and technical, blending imagination with skill to bring artwork to life.
What Are the Materials Needed For Epoxy 3D Art?
To create epoxy 3D art, gather essential materials that ensure both a smooth process and a high-quality finish:
- Epoxy Resin – Choose a clear, high-quality resin with a slow curing time, allowing for layering and detailed work.
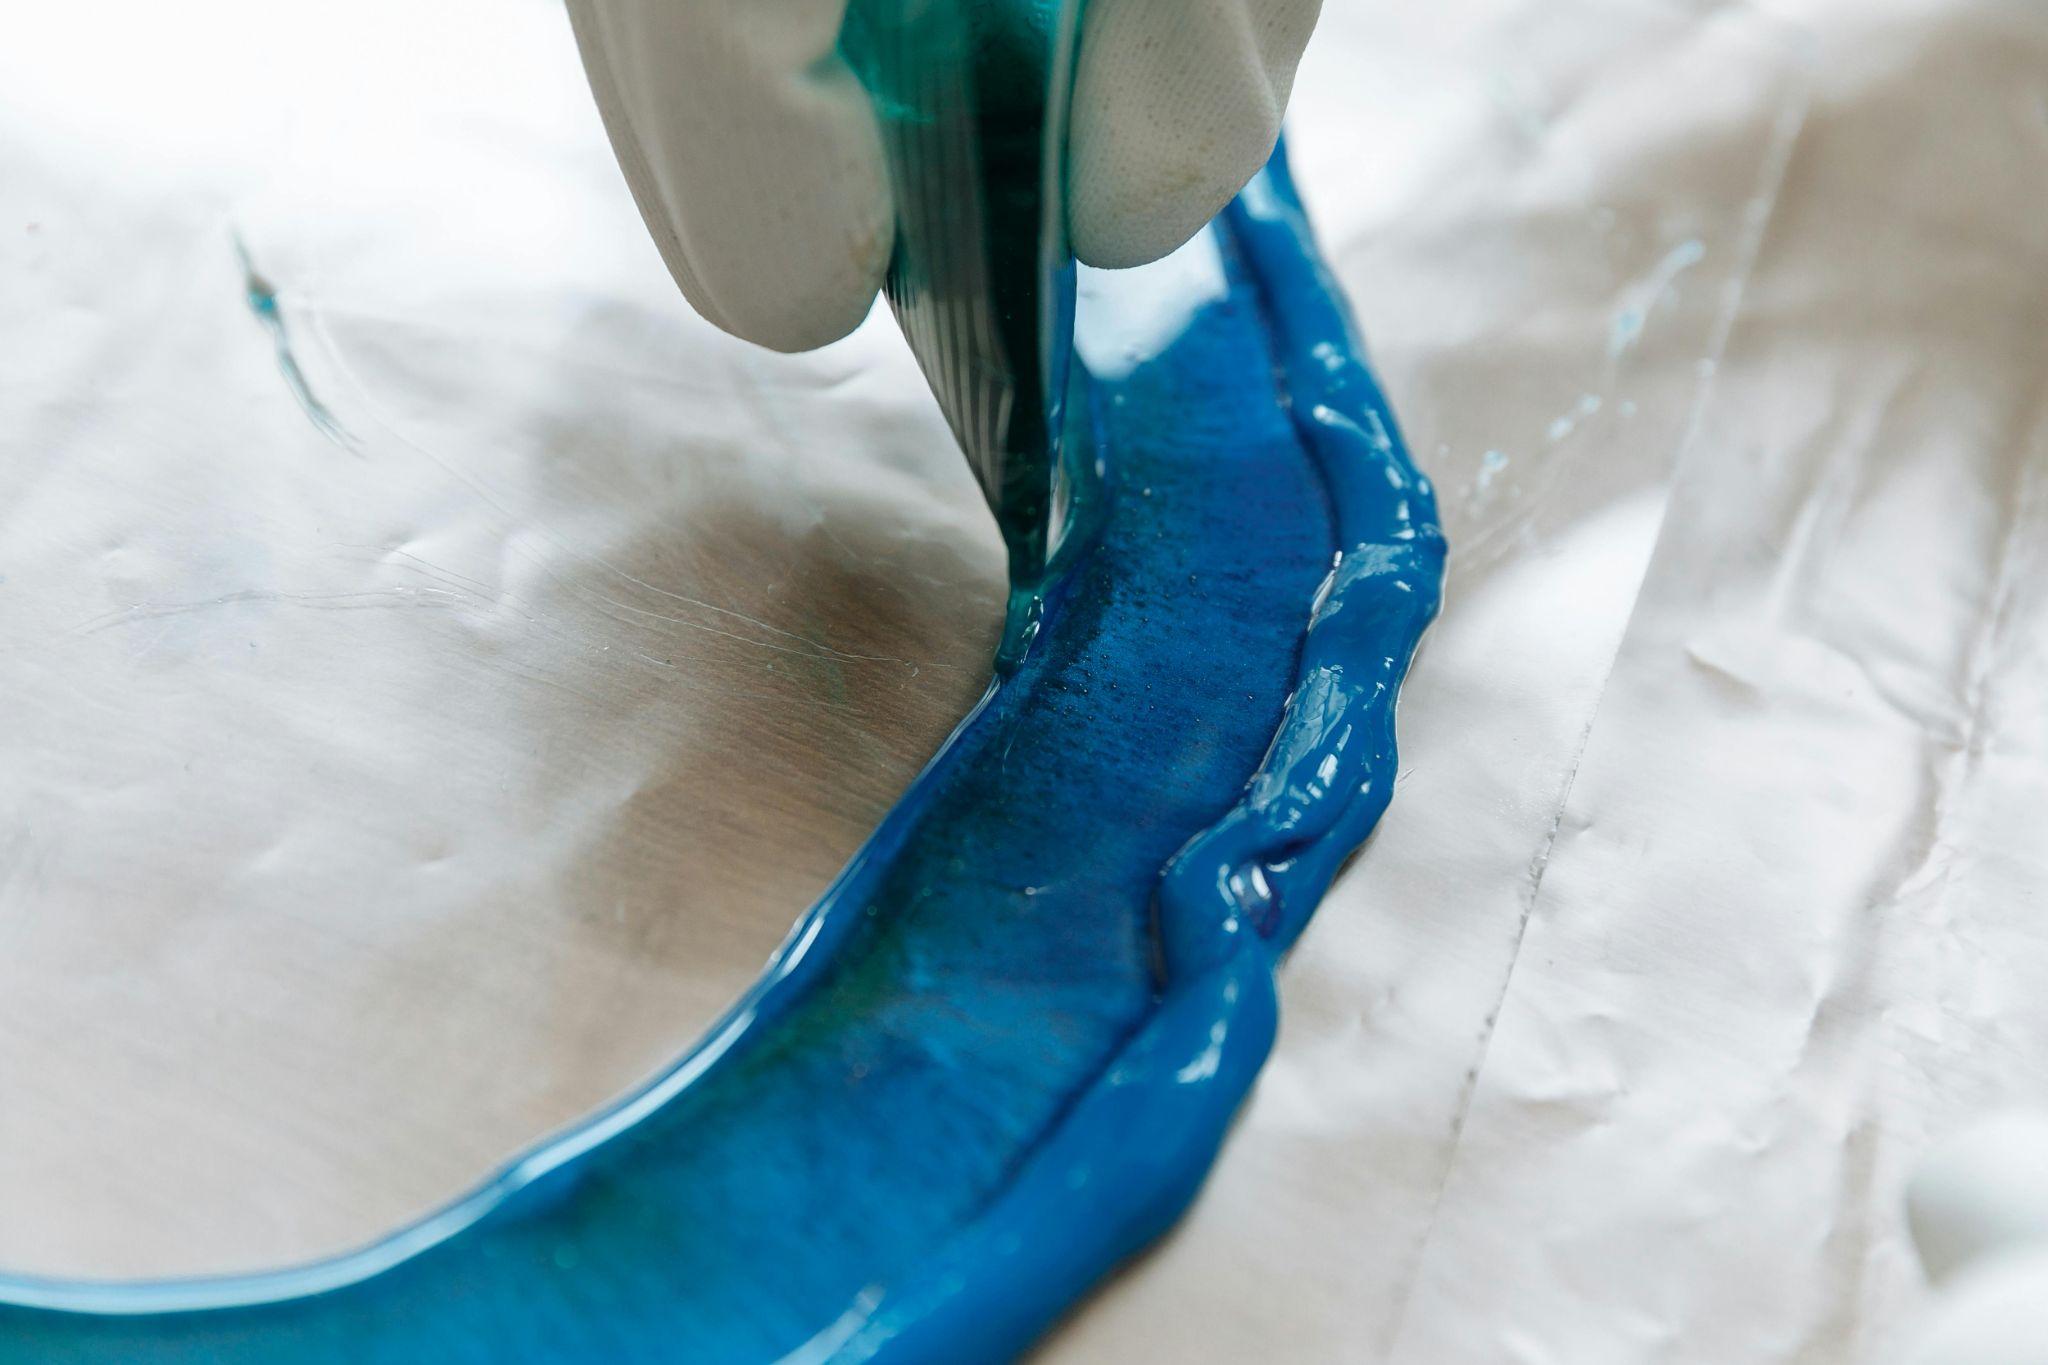
- Pigments and Dyes – Colored pigments, alcohol inks, and mica powders are perfect for adding color depth and vibrancy, essential for creating dimensional effects.
- Mixing Cups and Sticks – Use separate cups and sticks to measure and mix resin and hardener accurately without cross-contamination.
- Heat Gun or Torch – A heat tool is crucial for removing bubbles that may form in the resin, maintaining clarity in each layer.
- Mold or Surface—Silicone molds are ideal for projects like epoxy 3D sculptures; flat surfaces like wood or canvas are popular for 3D epoxy wall art.
- Protective Gear – Always wear gloves, a mask, and goggles to avoid skin contact and inhaling fumes from the resin.
These materials provide the foundation for creating epoxy 3D art that’s both stunning and durable.
Step-by-Step Guide to Make Epoxy 3D Art
Creating epoxy 3D art involves layering resin, pigments, and other elements to form a multi-dimensional, immersive piece. This guide covers key steps from planning to final curing, ensuring each layer adds depth and realism. Follow along to transform your ideas into lifelike, eye-catching artwork.
1) Planning Your Scene and Preparing the Materials
Begin by carefully planning your epoxy 3D art scene. Decide on a subject, whether it’s a realistic ocean scene, a landscape, or an abstract design, and sketch it out to visualize the depth and placement of each layer.
Having a plan helps you achieve the intricate, layered look characteristic of 3D epoxy resin art projects.
Next, gather essential materials, including clear epoxy resin, pigments or dyes, mixing cups, and a heat gun. Set up your workspace with a clean, flat surface and have protective gear ready.
Proper planning and preparation ensure each layer in your 3D epoxy wall art contributes to a cohesive and professional final piece.
2) Create the Background
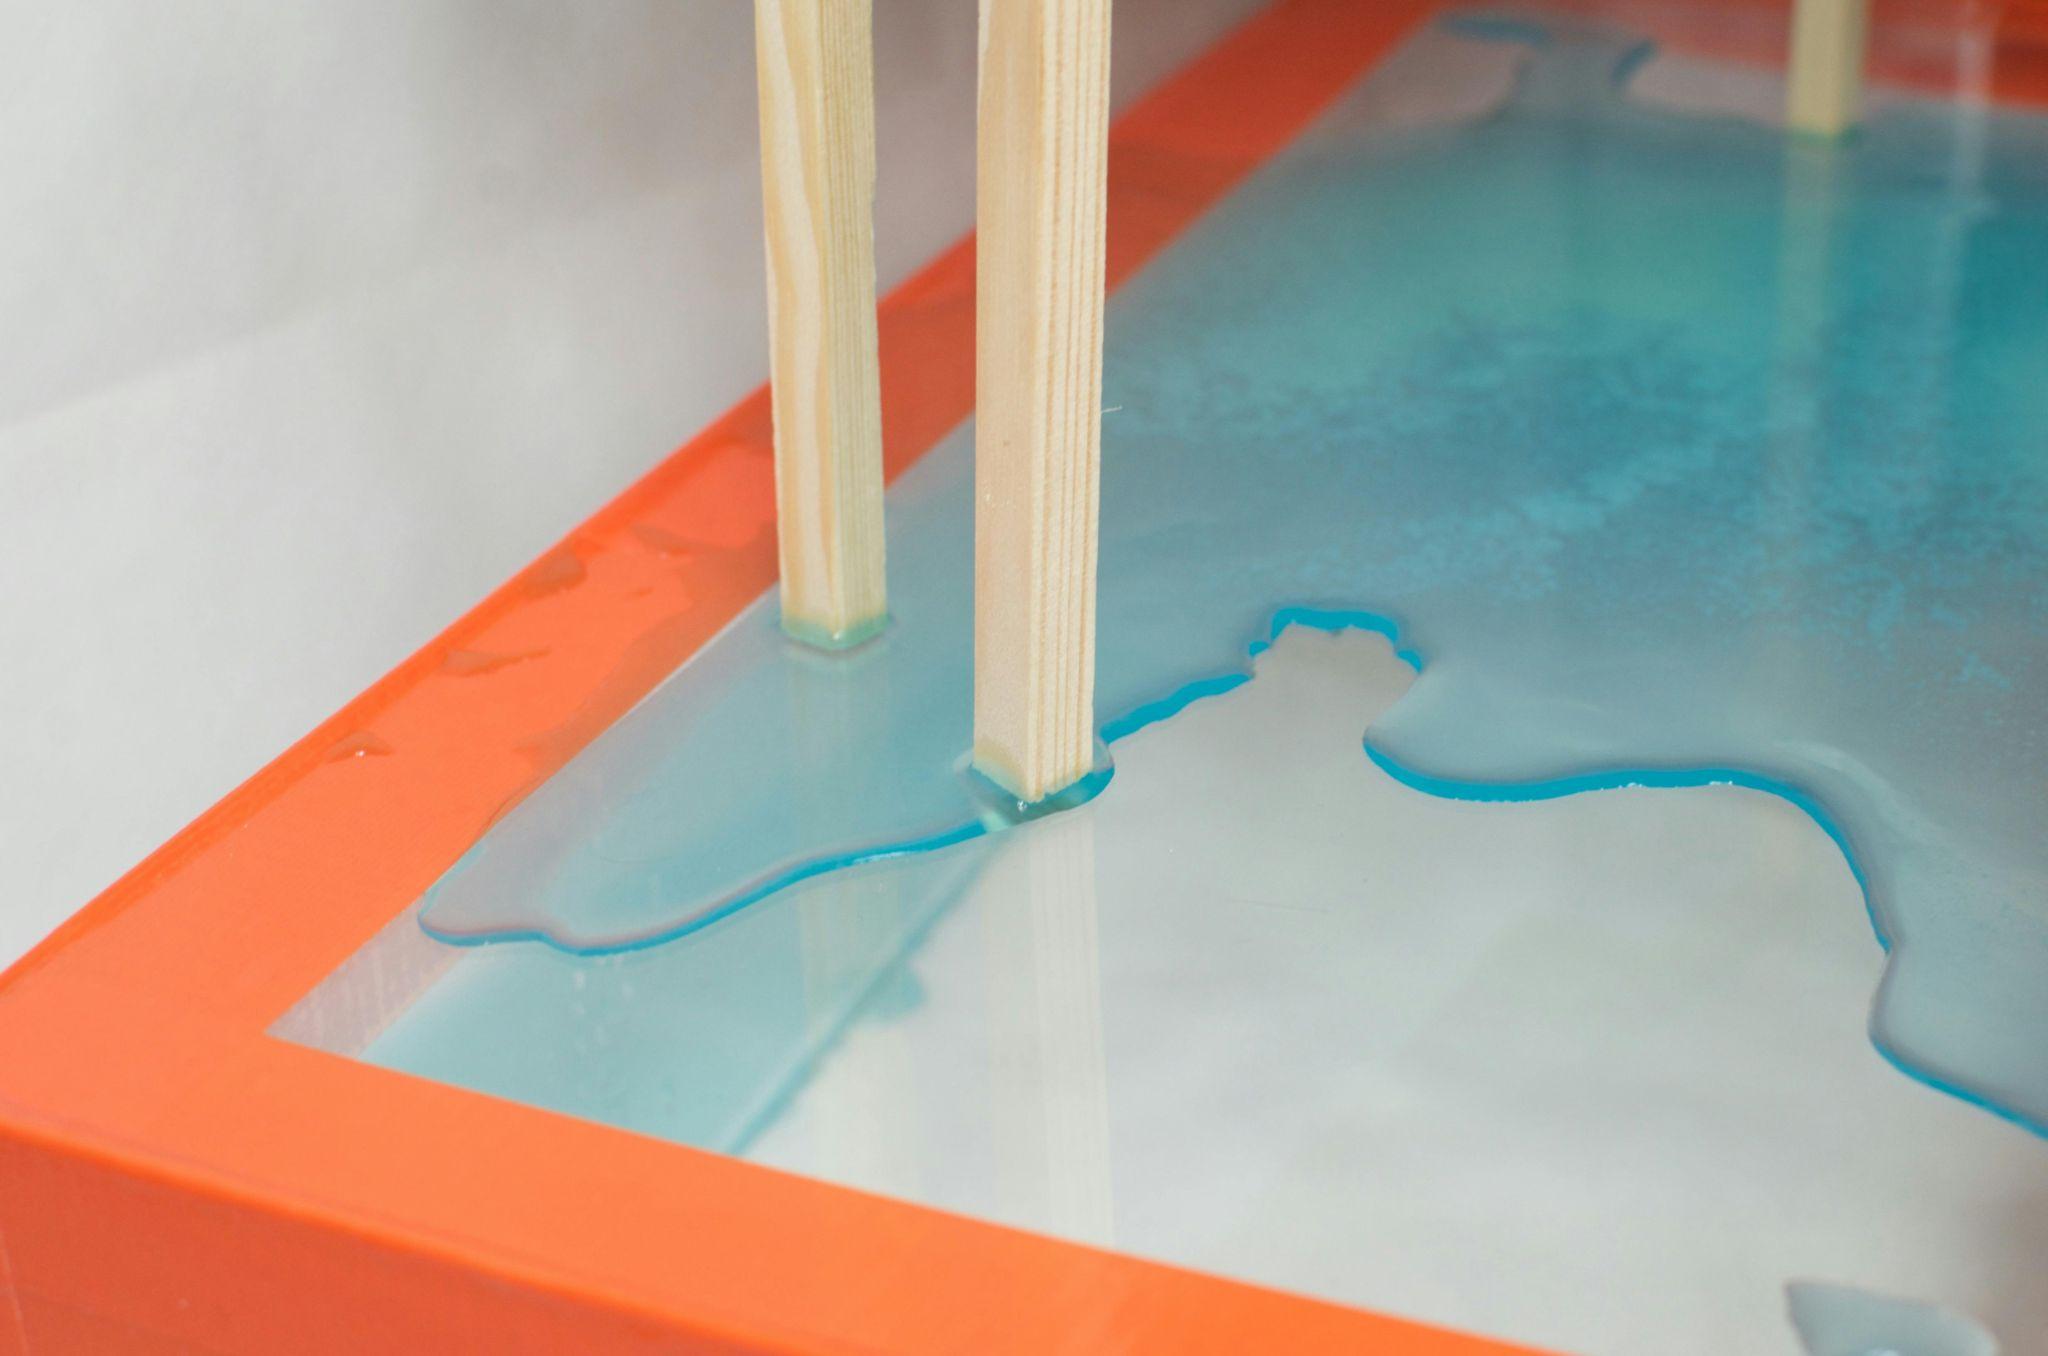
The background sets the foundation for your epoxy 3D art and is crucial for creating depth. Begin by mixing clear epoxy resin with the desired pigments or dyes to establish the base colors, whether for a serene ocean, deep forest, or abstract landscape.
Pour this first layer onto your prepared surface, using a heat gun to remove any bubbles and ensure a smooth finish.
Allow this layer to cure partially before adding further elements. This base layer in 3D epoxy wall art or epoxy 3D sculptures provides a visually cohesive backdrop, setting the stage for the details and objects in the next layers.
3) Place Objects to Build the Scene
After the background has been partially cured, start placing objects that add dimension and realism to your epoxy 3D art. Depending on your theme, these could include small stones, shells, leaves, or miniature figures.
Carefully position these elements to give a layered, multi-dimensional effect and enhance the illusion of depth.
To secure the objects, pour a thin resin layer over them and use a heat gun to eliminate any bubbles. Each addition should complement your 3D epoxy wall art or epoxy 3D sculpture, creating a scene that draws viewers in and intrigues every layer.
4) Pour the Next Layer of Epoxy
Once your objects are in place and the background has cured, pour another layer of epoxy resin to encapsulate these elements, adding depth to your epoxy 3D art. Mix the resin thoroughly, then carefully pour it over the surface, covering all objects while keeping the layer thin to enhance dimensionality.
Use a heat gun to eliminate air bubbles, ensuring a clear, glass-like finish. This step is essential for building the visual layers in 3D epoxy wall art and epoxy 3D sculptures, making each element appear suspended within the scene, and enhancing the illusion of depth and realism.
5) Repeat Layering and Curing Until You Get the Desired Results
Continue layering by adding new elements and thin layers of epoxy resin, allowing each one to cure before moving on to the next. Each layer enhances the depth of your epoxy 3D art, bringing the scene closer to life.
As you work, visualize how each element will appear within the layers, making adjustments for perspective and balance.
Gradually build up the scene, ensuring the layering complements your composition, whether it’s an intricate 3D epoxy wall art piece or a smaller epoxy 3D sculpture. This process of layering and curing will yield a final piece with stunning, multi-dimensional impact.
What are Some Techniques to Add Depth and Realism to 3D Epoxy Art?
Adding depth and realism to epoxy 3D art involves layering and creatively using colors, objects, and effects. Techniques like layering, color gradients, and embedding objects enhance the illusion of dimension, making 3D epoxy wall art and sculptures visually immersive and life-like.
1) Layering Techniques
Layering is essential for creating depth in 3D epoxy resin art projects. By pouring multiple thin resin layers, artists can separate background, midground, and foreground elements, achieving a sense of distance and dimension.
For instance, in an ocean scene, the first layers can contain deep blues and greens, while later layers introduce lighter hues and white foam details to represent waves. Each layer should cure before adding the next, allowing for controlled depth and clarity.
This technique builds a multi-dimensional effect, especially in epoxy 3D wall art and epoxy 3D sculptures, making each element appear as if it’s suspended at different distances, enhancing the artwork’s realism.
2) Using Pigments and Dyes
Incorporating pigments and dyes in epoxy 3D art is a powerful way to enhance color depth and realism. By varying the concentration and blending of colors, artists can achieve subtle gradients that mimic natural lighting and shadow effects.
For example, darker shades in the initial layers and lighter tones in subsequent layers create a sense of depth in ocean or landscape scenes. Mica powders and metallic pigments can add shimmer, giving water or sky elements a natural gleam.
Thoughtful application of pigments and dyes brings an authentic touch to 3D epoxy resin art projects, enriching each layer’s visual appeal.
3) Embedding Objects
Embedding small objects in epoxy 3D art helps add dimension and lifelike quality to the artwork. Natural items such as shells, stones, or leaves can bring a realistic texture to ocean scenes or forest landscapes, while tiny figures or miniatures add detail to abstract or fantasy themes.
Placing these objects strategically across different layers gives the impression of suspended depth, as each item appears to “float” within the resin.
This technique, popular in 3D epoxy wall art and epoxy 3D sculptures, captures attention and draws viewers into the scene, enhancing the immersive, multi-dimensional experience.
4) Detailing With Paints
Adding painted details to epoxy 3D art creates intricate, realistic effects that enhance each layer’s depth. By painting specific elements—such as waves, highlights, or shadows—onto cured resin layers before adding the next, artists can control the appearance of depth and add fine details.
For instance, white accents can simulate foam in ocean art, while darker shades can add shadow to underwater or forest scenes. Fine brushes and layered strokes bring precision to 3D epoxy resin art projects, enhancing realism.
This method is especially effective in 3D epoxy wall art, as it adds complexity and texture to each layer, bringing the scene to life.
What are Some Popular Themes For 3D Epoxy Art Projects?
Epoxy 3D art offers endless creative possibilities, with popular themes often inspired by nature, fantasy, and everyday life. Common choices include ocean and beach scenes, forests, cityscapes, and abstract designs, each adding unique, immersive visual appeal to 3D epoxy wall art and sculptures.
1) Ocean and Beach Themes
Ocean and beach themes are among the most popular choices in epoxy 3D art, allowing artists to recreate the tranquility and beauty of the sea.
These projects often include layered shades of blue, green, and white to mimic ocean depths and foamy waves, using pigments and paints to add realism.
Artists may embed small shells, sand, or stones to enhance the natural look, bringing a tactile quality to the artwork.
These coastal-inspired pieces are ideal as 3D epoxy wall art or table designs, capturing the soothing effect of water. Ocean themes not only resonate with beach lovers but also add a calming, nature-inspired touch to any space.
2) Forest and Mountain Landscapes
Forest and mountain landscapes are popular themes in epoxy 3D art, as they evoke the beauty and serenity of nature. By layering green, brown, and grey pigments, artists can mimic trees, foliage, and rocky terrain, giving the artwork depth and dimension.
Using darker shades at the base and lighter tones toward the top creates a sense of perspective, making hills and trees appear distant or close.
Small twigs or moss can be embedded to bring texture and realism, enhancing the feeling of a natural landscape. These pieces make excellent 3D epoxy wall art, adding a touch of wilderness to any room.
3) Abstract and Geometric Art
Abstract and geometric designs are ideal for epoxy 3D art projects emphasizing shape, color, and depth rather than realism. By layering bold colors and clean lines, artists can create a striking, multi-dimensional effect that adds modern flair to any space.
Techniques like marbling, metallic pigments, and angular or circular shapes are commonly used to achieve a visually engaging, almost hypnotic effect.
These pieces work especially well as 3D epoxy wall art, creating a contemporary aesthetic that enhances interior decor with an artful twist. Abstract themes invite viewers to interpret the work personally, making it a unique focal point.
4) Miniature World
Miniature worlds in epoxy 3D art capture tiny scenes in remarkable detail, creating enchanting displays that tell a story. Artists craft small figures, animals, or buildings to create themes such as bustling cityscapes, fantasy villages, or even underwater worlds.
These intricate details are layered within the epoxy, each component appearing to “float” at different depths, making the scene come alive.
Ideal for both epoxy 3D sculptures and tabletop displays, miniature worlds allow viewers to immerse themselves in the tiny landscapes, providing an imaginative escape.
This theme combines creativity with storytelling, offering endless opportunities to craft unique, intricate scenes.
What Is 3D Epoxy?
A 3D epoxy is a specialized form of epoxy resin that creates a multi-dimensional, layered effect in artworks and designs, giving them depth and lifelike realism.
Unlike standard two-dimensional applications, 3D epoxy art involves layering transparent resin, often with pigments, objects, or textures embedded within each layer, to build a three-dimensional effect.
This technique is commonly used for creating scenes like ocean waves, landscapes, or even abstract designs, resulting in visually immersive pieces.
Artists use 3D epoxy for applications such as 3D epoxy wall art, sculptures, or furniture surfaces, where the depth effect transforms ordinary items into eye-catching, realistic artwork.
Final Thoughts
Epoxy 3D art is an incredible medium that allows artists to transform imaginative scenes into visually immersive pieces, bringing depth and realism to everything from 3D epoxy wall art to detailed epoxy 3D sculptures.
By mastering techniques like layering, color blending, and embedding objects, artists can achieve lifelike effects that truly stand out.
This art form not only lets creators explore themes such as ocean scenes, landscapes, and abstract designs but also adds dynamic, dimensional decor options to any space.
Despite the challenges, epoxy 3D art projects reward patience with stunning results, making them ideal for anyone looking to add personalized, unique art to their home or collection. Ready to start your own project? Visit JBH Chemical Ventures for top-quality epoxy supplies and expert support.